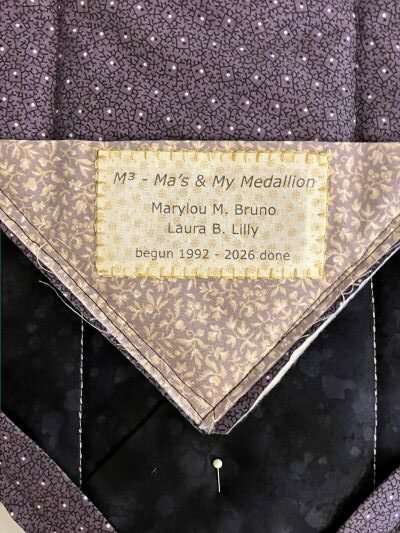
Once upon a time, there was a mother and daughter who liked doing things together. One year, shortly after the daughter’s parents moved into another house, the daughter thought it’d be cool to make a housewarming quilt for them. After all, she’d made at least 10 bed-sized quilts over the years, including a scrap quilt for her folks’ mountain cabin early on, way back in 1982.
When the daughter talked to her mother about preferences regarding design and color scheme, the two of them realized this would be a fun project to take on together…
And so, we did.
Ma offered up design ideas for the King size quilt-to-be, and I found a pattern idea for the medallion section.
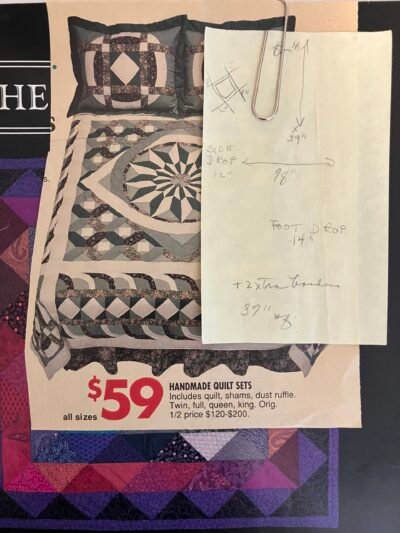
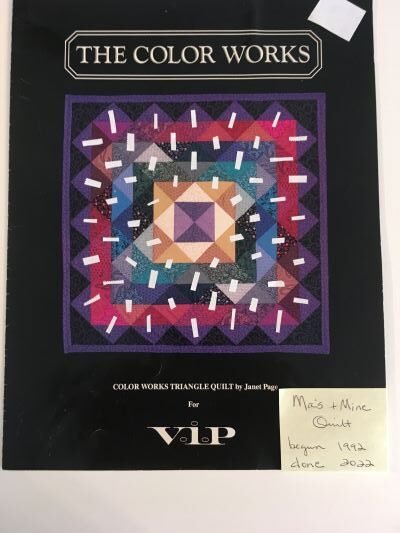
We decided to position the medallion en pointe and square it up with to-be-determined related corner designs. The resulting center square would then be surrounded with alternating pieced & solid fabric borders until it reached the required length and width for a King size quilt.
The Color Works pattern used the traditional method for creating HSTs (half-square triangles). That is where each triangle is cut individually then sewn with another to make one HST block unit. Not only is that a time-consuming method, but manipulation of the bias in the process of further construction causes inaccuracies in the completed HST block unit.
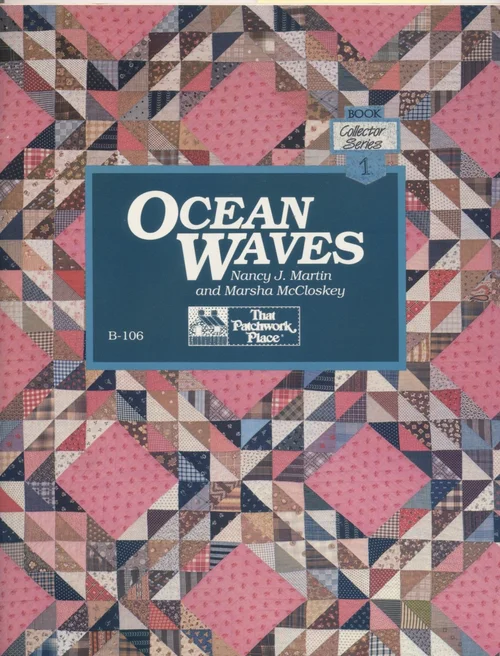
A few years earlier, I was introduced to a groundbreaking new method of HST block construction based upon rotary cutting from the quilt book, Ocean Waves by Nancy J. Martin & Marsha McCloskey. Shortly after its 1989 publication date, I plowed full steam ahead and made a Queen size scrap version of that quilt***, relying heavily on my knowledge of using value as a means to make sense of multi-colored scrappy scraps.
Using this new-at-the-time bias strip piecing method solved the bias distortion problem. The bias strips are cut, sewn together on the bias edge, then cut into individual HST block units. That leaves the outer edges on the stable grain of the fabric with the bias contained and safe from excessive manipulation. A demo of this method can be viewed here.
Design and method determined, now came the fun part. Gathering fabrics. And…teaching Ma how to use the rotary cutter! A quick learner, we spent snippets of time together and separately dutifully cutting out hordes of bias strips.
Here then, is where part 1 ends. I’m wondering: did any of you, my dear readers, discover when this project began? If so, then did anyone further notice the length of time it took to complete? Hint: clues can be found in the featured image.
Let me know in the comments below and stay tuned for part 2!
*Sales advert from some department store – 1990s pricing on poorly stitched imported handmade quilt sets made with cheap quality fabrics, all sizes.
**The VIP Color Works Collection Triangle Quilt/Wallhanging by Janet Page for VIP. Pattern instructions such as these were displayed alongside bolts of new fabric collections and free for the taking. None of the fabrics from this specific collection were used in M³.
*** Photos of it are buried deep in a box somewhere. 🙁
Well, that was a blast from the past for sure! Of course I remember when VIP was about the only quilting fabric out there, and all of it calico! Glad you got to revisit a project you did with your mother.
I never thought I’d say this, but I wouldn’t mind a bit of calico here and there… HA!
BTW: you were instrumental in helping me finish the M3 – part 2 might jog your memory whenever it gets pubbed. 🙂
Laura, a great family project and an incredible story! 💕 Looking forward to part 2.
My sister has made a lot of wild-looking quilts since she retired, all given away or donated. My sole contribution is watching various stages of the quilts via email and giving my opinion along the way.🤣
That contribution of yours is vital! Keep up the keen eye!
Mom and daughter working on a project together for over 30 years builds a relationship everyone wants.
…and keeps the memories alive…
Every quilt has a story, some just take a little longer. Some are LOTR tomes (so to speak) others are little board books – haha. Regardless, it is a fun collaboration between you and your mom. What a fun thing!
Wendy – what a wonderful surprise to see you here (given your recent eye surgery). To your point, I’m thinking here of how you ‘continued’ projects begun during a loved one’s life time long after they had passed away. It’s cathartic even after 34 years! 😉
Thirty years! It takes real dedication to stick with a project that long. I’ve only done a small bit of quilting in my life, mostly baby blankets using big squares. But once I made a baby quilt with a pattern calling for triangles. It was for my nephew’s first born and goodness knows where it is now (his wife divorced him while the first born was only a couple of years old and that first born is now a high school graduate).
A couple of friends are quilters and I think they mostly quilt alone, but it seems that quilting is an ideal activity to do socially. What a wonderful bonding activity for a mother and daughter. Of course, we knitters could get together and knit, but then we are working on our own separate projects. The idea of quilting together, on one project, is so appealing.
Looking forward to part 2!
Technically it’s 34 years (see in-progress quilt label in featured image). The sticky note on the pattern photo was written when I was ‘almost’ done and hopeful! And as a creative yourself, you know projects often morph from original intent and design over the course of finishing. In this case, 34 years changed the final finished piece considerably…Part 2 will fill in those details with photos, too! Hey, I love your knitting activism events – all clacking needles together for a worthy cause. Keep your ‘needles crossed’ for this Tuesday…just sayin’…
😉
I might have read the label wrong, or my math is that bad 😂
A couple of days ago, I was talking with a friend who is a quilter. (Also, she is a California friend who now lives in Oregon; I haven’t seen her in over 20 years). I told her about your quilt project, and we discussed how well quilting lends itself to community. She told me a sweet story of how every few months, she spends a week with an 86-year-old friend who is a master quilter. It’s like a retreat for Jan: “We get up in the morning, have a cup of coffee and then get down to sewing. We get so much done!” ‘
I love this image of an 86-year-old woman still sharp enough to create and to be good company. I think I’ll strive for that. I definitely feel more hopeful about such a future this morning 🙂💙
Me, too. 🙂💙
Love this collaborative endeavour! It resembles an exchange of stories between different generations.
A wonderful analogy, Khaya!
Sounds like such a sweet, fun project to undertake with your mother!
🙂
Any parent can appreciate the idea of working on a project like this with one of your kids. Making more memories together.
Pete, that’s what it’s all about…relationships in action.
It was a quicky, only 30 years!
🤣. Thanks for the tongue-in-cheek pat on the back!
What a project, and what a wonderful mother daughter collaboration. One would need lots of love and patience IMHO to make HSTs from bias strips. Also, lots of time — 20 years or so.
Your post has struck a chord. I am busy working on a set of HSTs, but using an easier method.
Meanwhile, I look forward to part 2 of your story
Thanks, Mariss. That HST method was truly easier than what went before it – even if ‘ugh’! This was at the beginning of Rotary Cutting Discovery in the quilting arts. Since that time, many other methods worth using have become standard that still keep the bias edge minimally ‘abused’. 🙂 Even tho…when I came back to the project, I felt compelled to resume using that old method for my own sense of integrity & continuity. How’s that for a spoiler to part 2?! HA!
Now I really can’t wait for part 2.
Rotary cutters are revolutionary (!).
I always obsess my comment didn’t take because I can’t see it until it is approved, lol. I will try to remain calm this time, ha!
Never fear – it will appear! 🙂
1992 – 2026 – now THAT is a “UFO” finish of epic proportions! (UFO = unfinished object in quilters lingo for the non quilters)! I am just catching up so I assume there is a complete photos of this amazing quilt we will see 🙂
Yep – part 2 will be more photo heavy.
I have no idea when or how long, but it sounds like you enjoyed the project! I don’t know anything about quilting.
It certainly has been a singular journey!
Once I commented and the post closed, I could see the other photo. For some reason, when I clicked on the post the first time, the book cover didn’t show up. I saw the note on The Color Works photo. Thirty years! Wow!!
You’re a super sleuth, L.Marie! Yeah…I thought it’d get finished in 2022…but here we are 2026 (featured image clue). As a non-quilter, you might not get that it is a photo of the quilt label in the process of being sewn into the finished piece. More photos to come later in pt2. Happy Friday!
I didn’t see the featured image until after I commented.
Thanks for letting me know. It appears WP updates don’t like how my specific WP theme works with featured images…yet another to-do to fix. Yikes!
Oh no! 😞
Looking forward to part 2!
As a non-quilter, I didn’t get most of it 🙈😂 Apart from the admirable dedication.
I’ll take that! 😉 Glad you got some sort of take-away, Andy.
Laura, the pattern looks very intricate!
I’m wondering if some photos are missing in the post? I see two photos and one caption about a cover.
I’m having problems with the featured image tool…I think it’s more theme related than a literal WP issue. Geesh.